Importing VMware server to e24cloud
e24cloud provides a tool for secure, fast, and automatic migration of VMware servers.
The following process demonstrates how to import a server in two possible ways: manually, where we specify the entire
server configuration and indicate images for individual disks, and an automatic process that configures the server for
us using a vmx file.
Preparing images for import
Before starting the import of a VMware server to e24cloud, export disk images of the server in uncompressed vmdk
format (the vmdk image file must be the size of the target disk) and an optional vmx file that will facilitate the
server import later.
Uploading images and configuration file to e24files
Upload disk images and configuration file to e24files. It can be your account or another user’s account, in which case you will need to specify it during the import.
We recommend using trusted tools such as Cyberduck or S3 Browser. The entire configuration process can be found in this article.
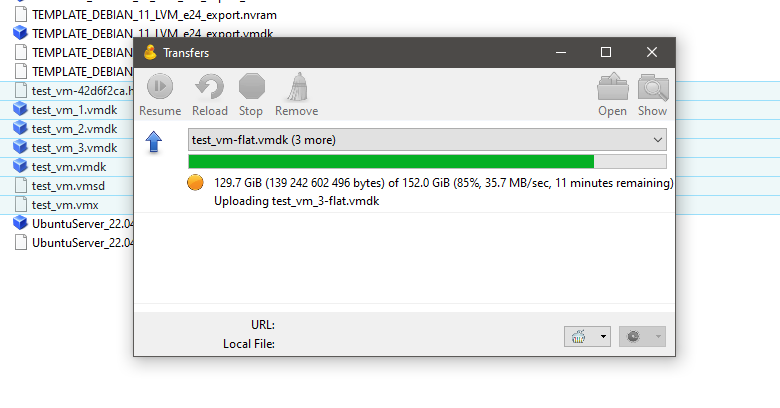
To minimize costs and simplify the entire migration process, e24cloud provides free e24files space for uploading server disk images to be imported. Please contact us through the Customer Panel by creating a ticket in the Technical Support tab or via email.
Importing VMware server in the e24cloud panel
After logging in, go to the Servers > e24cloud Servers tab and click on the Import VMware server button.
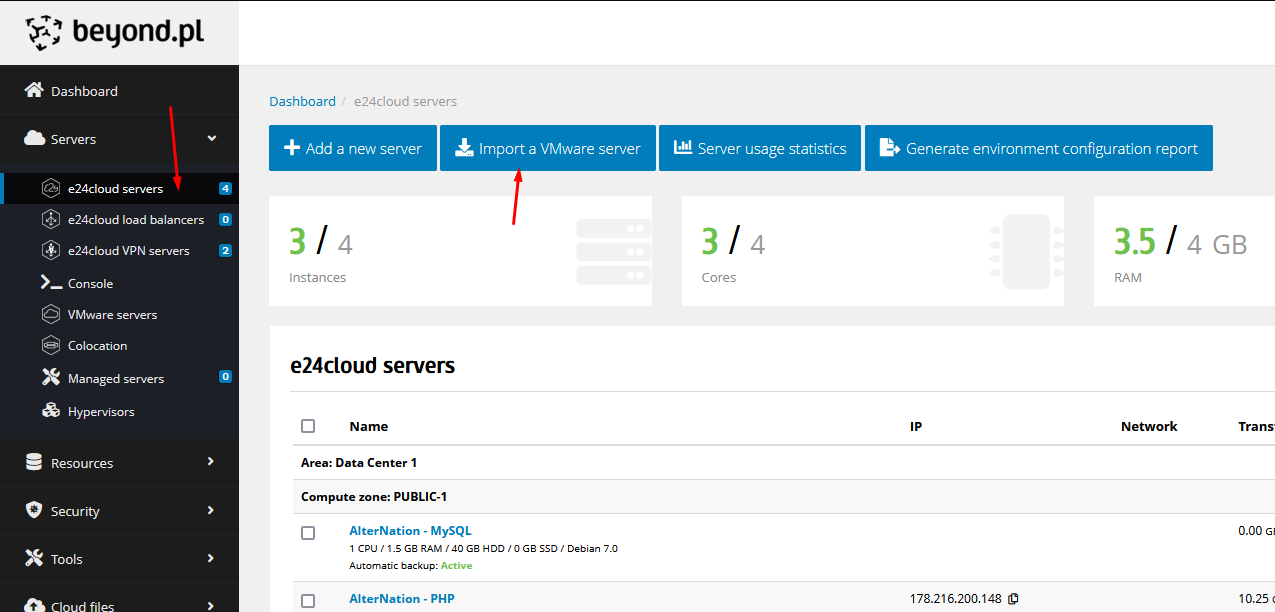
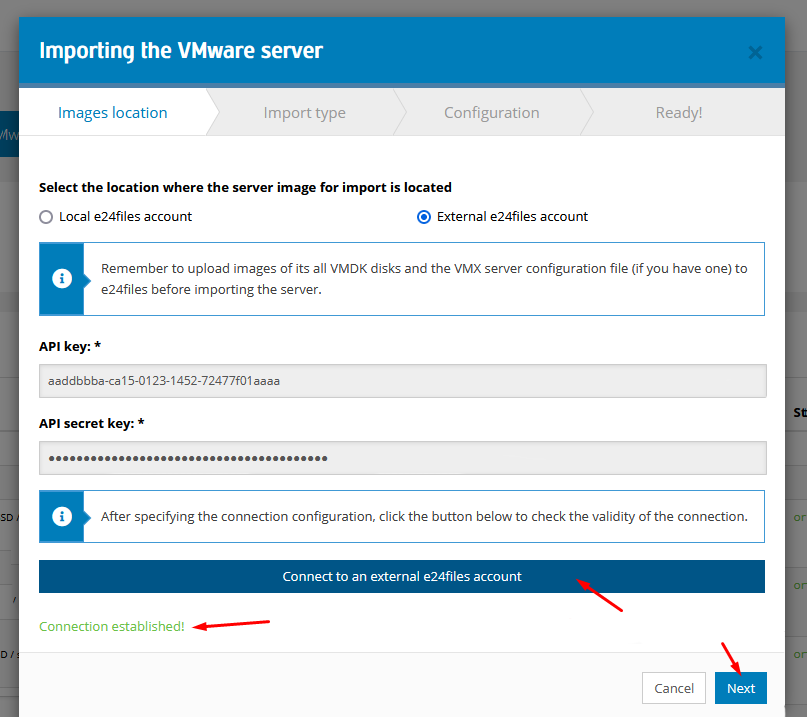
Next, specify the location where the disk images and optional vmx file are located.
If you choose the local e24files account, click the Next button.
If you choose an external e24files account, enter the access credentials for that account, and then click the Connect to External e24files Account button to verify the connection. After successfully connecting to the external e24files account, click the Next button.
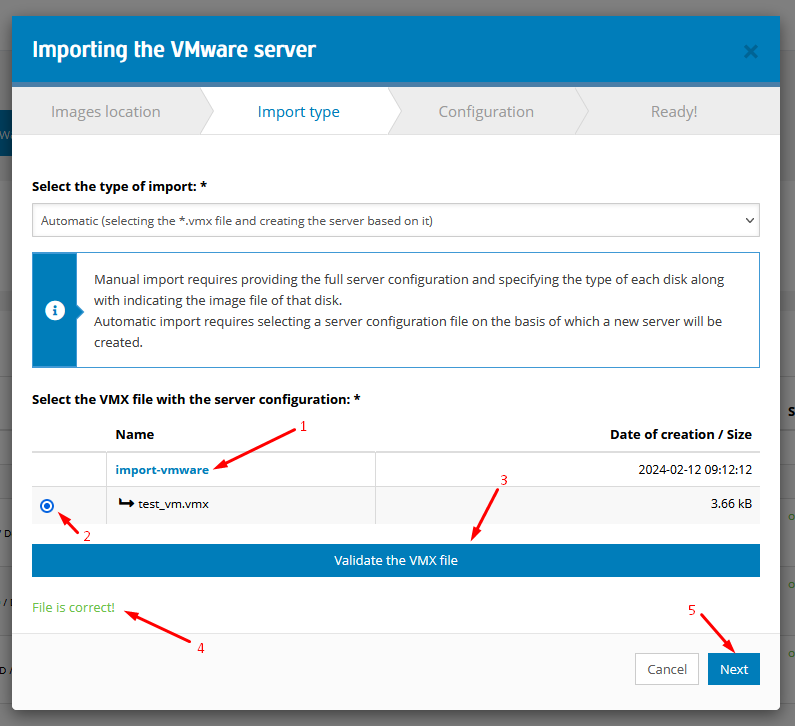
In the next step, choose whether you want to perform a manual import (where you specify all server parameters and images for individual disks):
- manual - click Next to proceed to the next step,
- automatic - specify the
vmxfile based on which the server will be configured. To do this, you need to point - to the
vmxfile and then click the Check VMX File Validity button. After successfully verifying the file, - click Next to proceed to the next step.
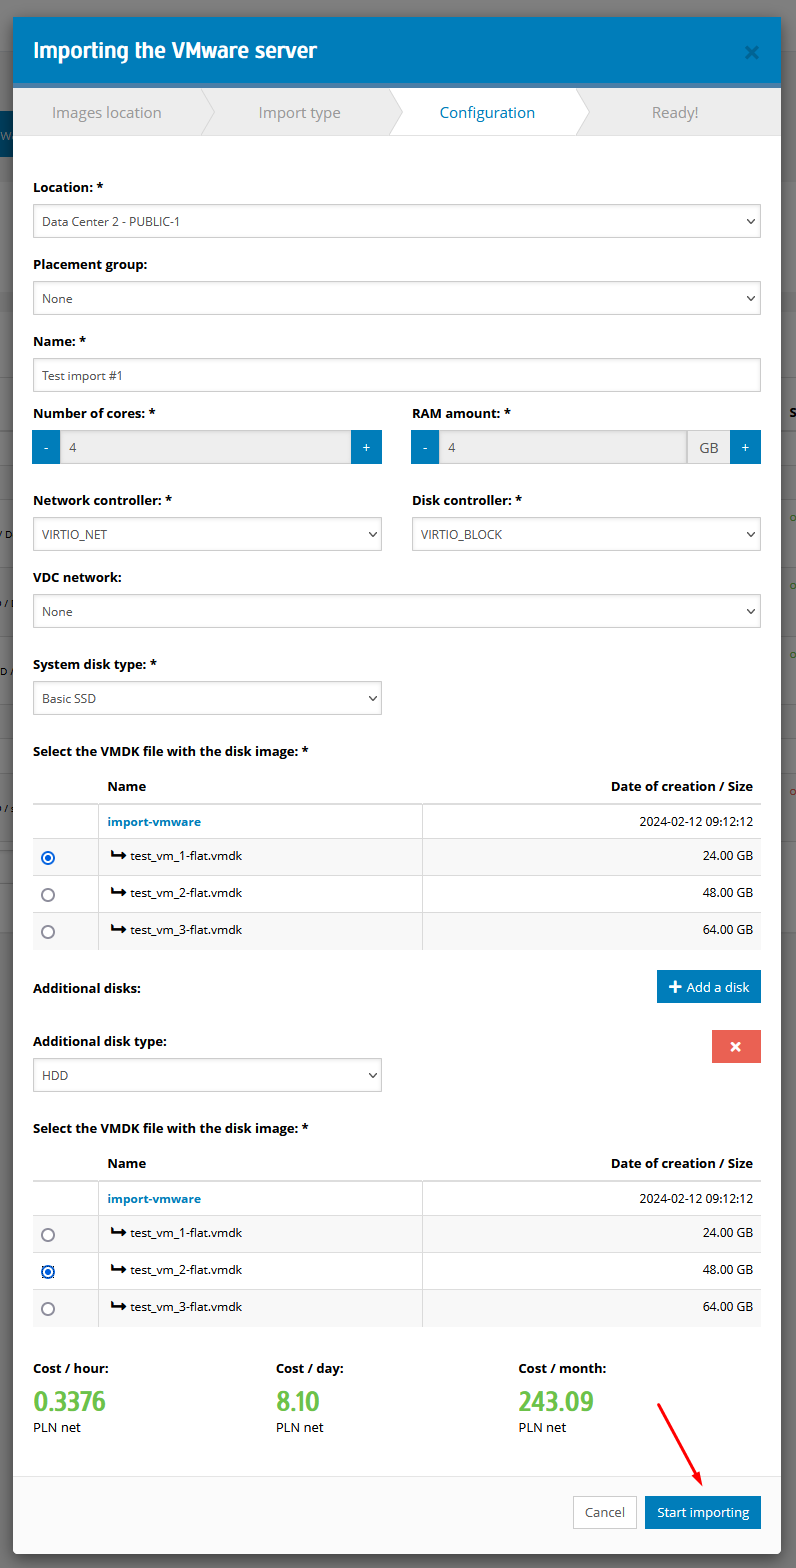
If you chose manual import, in this step, you need to specify the entire server configuration, including its name, location, CPU and RAM quantity, and the number of disks along with their performance and images of disks from the VMware server you want to import. After completing the configuration, click the Start Import button.
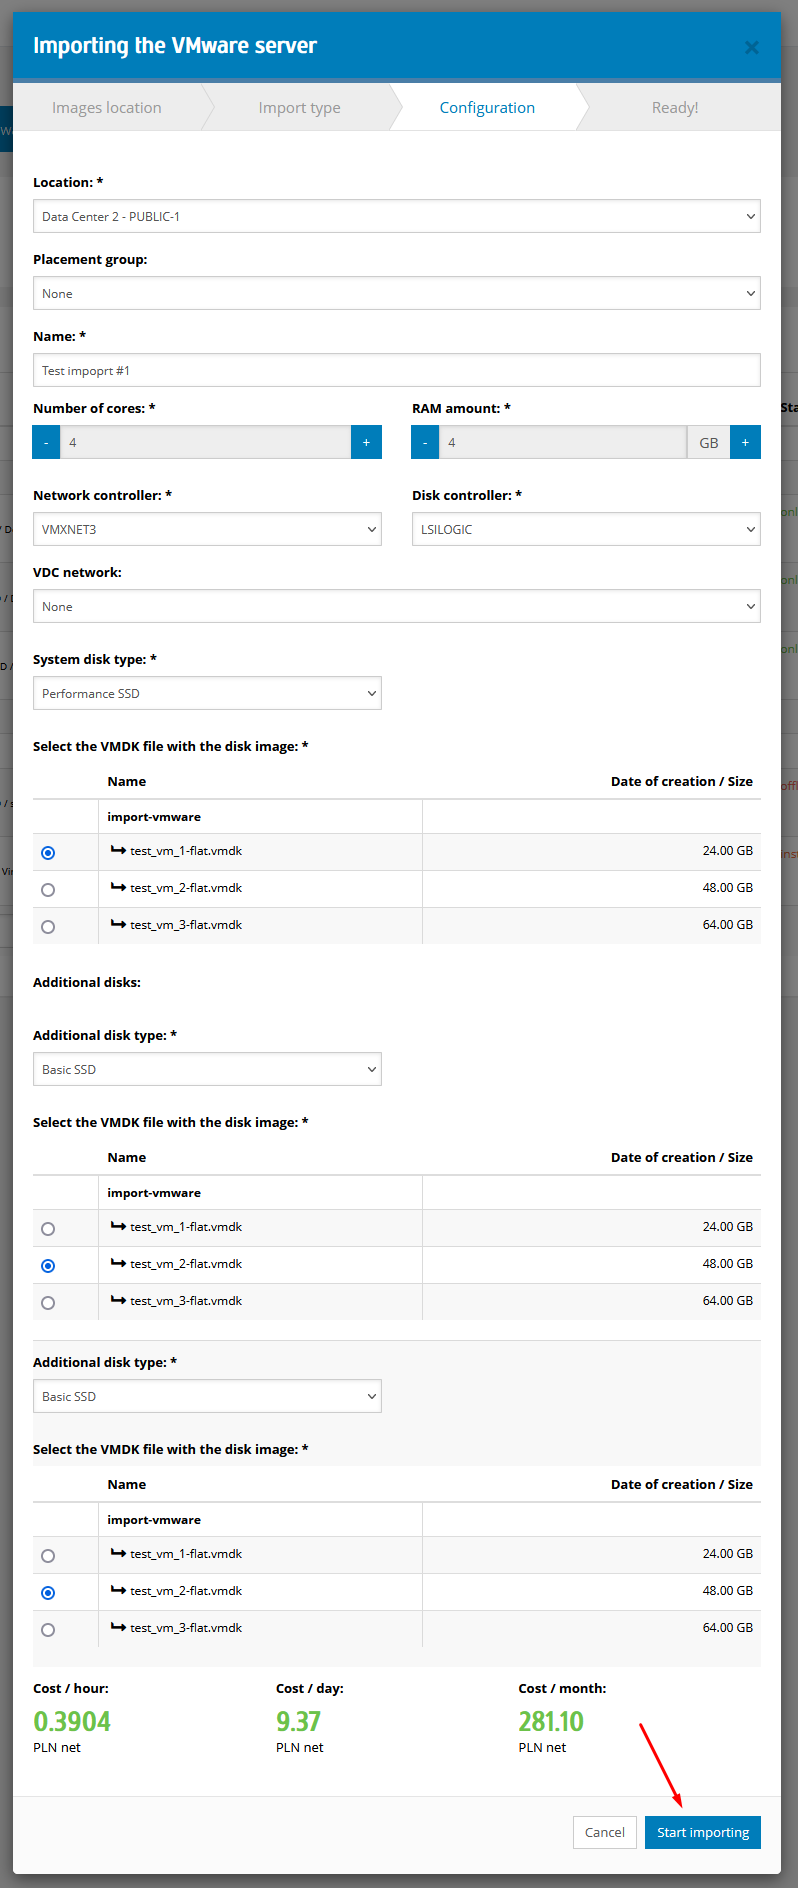
For automatic import, the server creation form will be filled with data from the vmx file. The minimum configuration
will be specifying the location and naming the server. Of course, you can change the server parameters according to your
preferences. Please verify the loaded configuration. After completing the configuration, click the Start Import button.
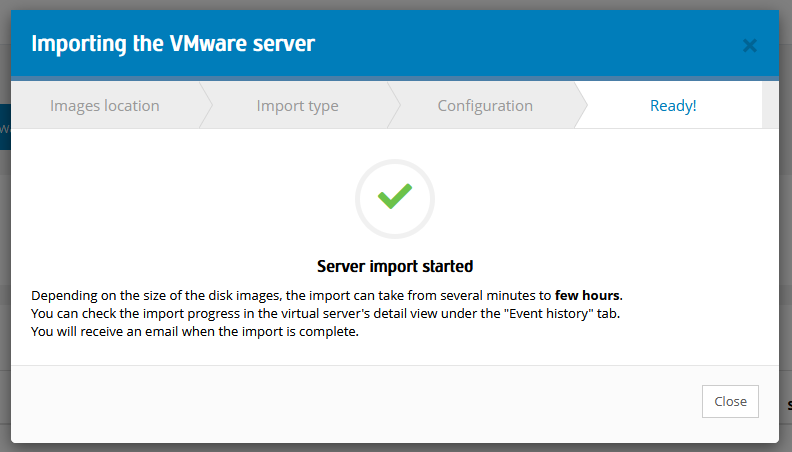
Depending on the size of disk images, the import may take from several minutes to several hours. You can check the progress in the detailed view of the virtual server in the “Event History” tab. After completing the import, you will receive an email notification about the installation completion and server startup.
Network Configuration
After the server import is completed, access the web console available in the Customer Panel in the detailed server view and verify the network operation. The server import will change the public IP address, so adjustments must be made on the operating system side.
All trademarks used in this material are the property of their respective owners. They have been used solely for informational purposes.